This page contains affiliate links. Learn more.
First off all, so that I don’t have to copy paste copyrighted material, and before I go into details I suggest reading some basic information about ozone and ozone therapy procedures at home here and here. There is also a good TV documentary called “Ozone, A Medical Breakthrough” that is a revised version of and earlier document Ozone and The Politics of Medicine from 1994 and it can still be found on Youtube. It could be taken down any time though.
For some people, especially CFS patients even 2-4 months intensive healing program taken abroad is not enough to get completely cured, but will act as life changer and kick-start to longer exploration into the world of holistic healing and dietary and lifestyle re-evaluation where every stone has to be turned in order to gain understanding what is happening and to find root causes of the problems. And hopefully and eventually cure them completely or at least ending up finding a good balance with life enjoyment and restrictions and settling with regimen that you can do at home any time as maintenance. Personally I would have been hesitant doing these modalities by myself without first going through a program under doctor’s supervision. One needs to study a lot for doing things right and efficiently.
But in case you don’t have access to functional doctor or naturopath you may need to resort to do ozone therapy procedures at home on your own from the start. Some of the modalities of oxygen and ozone therapy that can be administered at home include:
-Breathing concentrated oxygen purified by oxygen concentrator
–Hydrogen peroxide cure by drinking
–MMS / CDS (Master Mineral solution) topically or drinking, although it’s actually not ozone therapy
-Drinking ozonated water.
-Ozone sauna cabin
(many of those cheapest infrared sauna cabins are not proven to be ozone resistant, but according to many user testimonials on Youtube, the benefits override potential harms of slight plastic bleed-off)
-Ozone limb and full body bagging
-Ozone ear insufflation with humidifier
-Ozone rectal and vaginal insufflation
The breathing method is probably the least effective, and that is usually done by elderly people who have some lung problems. But the rest are more suitable for anyone to experiment (see medical disclaimer). Direct IV ozone treatments are rather controversial and I have never tried them nor being given by doctor. I am not able to advice on those, but they require medical grade oxygen and preferably syringe pump to avoid accidents. EDIT (2018): I have now experimented DIV at Sri Aurobindo Health Society Healing Centre in Puducherry, India

Before going any further it’s important to point out as a side note that chelation one way or another is crucial part of integrative healing and it’s possible to combine it with ozone therapy procedures at home. I would recommend Advanced TRS spray by Coseva or some EDTA suppositories. Suppositories in the night and ozone in the daytime would make an intensive protocol, but adding rest days here and there will be important in the beginning. So far I don’t have anecdotes or other reports in using TRS along with ozone, so it might be good idea to spread them a part as well to avoid the zeolite being oxidized. TRS remains in the body about 6-7 hours. (EDIT: I got answer from Coseva stating that it should not interact negatively with ozone if done rectally)
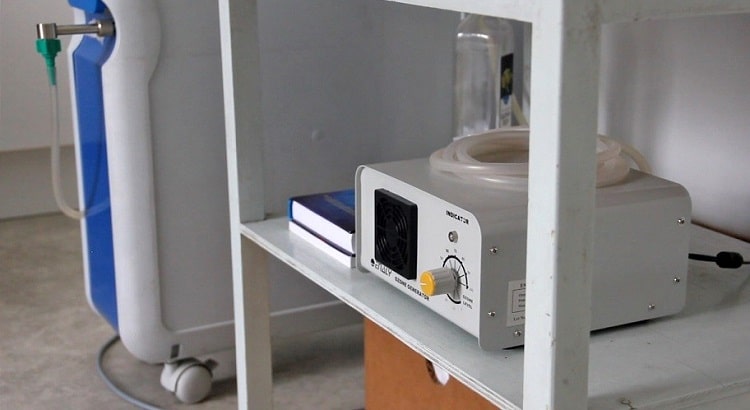
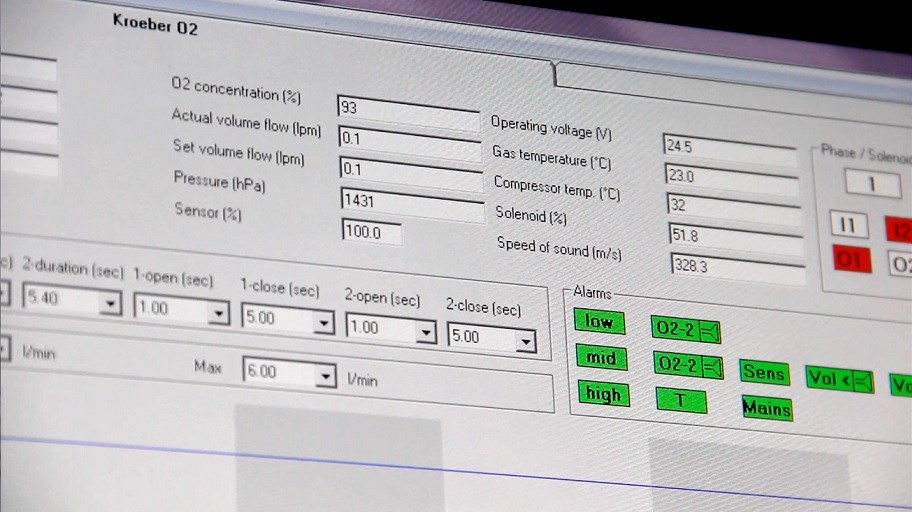
I made a video demonstrating how to do ozone rectal insufflation on your own that is almost as efficient as autohemotherapy. There are couple of videos on Youtube about how to do rectal insufflation, but I made mine to show how to operate Kröber O2 concentrator as it gives out 1/10 LPM that is suitable without any bags in between in combination with industrial grade ozone generator Enaly 1000BT-12 or 1KNT. I find that Kröber O2 is the most advanced oxygen concentrator in the markets for it’s price, being microprocessor controlled and thus allowing user to monitor it’s functions and adjust the flow rate in computer program through USB cable connection. It has also pretty design and modular structure, that makes it easy to repair. I used to call it the Mercedes-Benz of oxygen concentrators until I learned that the parts come from China and they only assemble them in Germany. So to call them “Made in Germany” has lost it’s meaning. Or it applies only to the engineering and design.
But especially the 1/10 LPM flowrate makes it more simple than most examples you’ll find on internet. Most oxygen concentrators out there give only 0,5 LPM which for most users is too fast for direct colon use at least in the beginning when the colon is not used to such procedure. I have done it with 0,5LPM flow speed too, but if you are not careful there are risks for creating too much stimulation that may eventually crash your adrenals that may lead to adrenal fatigue. In case you are not able to buy it in US the other products that comes to mind is for instance Philips EverFlo Q, but it needs some kind of additional accessory to allow below 0,5 LPM flow. For getting Kröber O2 to North-America you must find some sellers on German Ebay or contact the manufacturer directly. Sometimes Ebay also has few used ones and Germans can check the local Ebay as the manufacturer does not have official dealer there nor in India or Australia. So there are some people selling used ones too if searching by the word “Sauerstoffkonzentrator”. I bought mine, a used one, some years ago for about 299Euros(~320USD) plus shipping from Germany. New ones come with five years or 30 000 hours guarantee. Until now I haven’t got any freebies from Kröber or any other company for doing this semi-promotional guide, but there are affiliate links that will generate little commission to me if you end up buying through them. (EDIT; they do not even want to repair my broken one as compensation for this promotion)

In the other hand some special models that are sold in USA gives out very slow flow rate such as 1/32 LPM which takes very long time to proceed as it’s said to be about the rate at which our colon absorbs the ozone or it’s byproducts, allowing even longer exposure times. I haven’t tried that and find 1/10LPM adequate. Some experts say it is not safe to do those extended treatments lasting 30-45 minutes or so as it may damage the colon lining if they are exposed to ozone for too long at one time even if the theoretical margins that our cells can handle ozone wouldn’t be exceeded. In EBOO the blood cells that go through ozonation are moving and passing by, so it’s not static scenario as exposure inside colon. Promolife has models that give 1/8 LPM flow speed which is also suitable to be used without bags, but then you need to raise the knob on Enaly ozone generator to about 30-35% for the first time. And those American made models do not have such a sophisticated microprocessor control and PC interface via USB and they are of clumsy design in terms of aesthetics.
The other most important part in the procedure is of course the ozone generator. Promolife sells high quality generators like this one, but if you want to save money even more I can recommend the aforementioned Enaly 1000BT-12 that does the job as well, but is less accurate.
Take notice that Enaly 1000BT-12 is industrial grade machine and not approved for medical use. All experimentation is done at your own risk. Those who are concerned about the ozone resistance of it’s tubing material may check this video that shows how to replace them with Teflon tubes. Personally I don’t think it’s a problem because in this purpose it’s used only couple of minutes per day on close to minimum settings periodically, not many hours a day on maximum setting continually like in some industrial applications that puts the material under greater pressure which may reduce it’s durability and classification from the highest to medium regarding ozone resistance. Some of the ozone resistance test charts you can find on internet are done under rigorous settings when materials are exposed to very high concentration and long lasting exposure.
So I find in this type of modalities it’s enough if you simply can’t afford anything more. Here I found few sellers. Some of their shipping conditions exclude several countries for reasons I don’t understand. Check which ones include Australia and North-America. And I found few sellers that deliver the newer model 1KNT for North American clients. It is basically same type of generator but more silent. And those of you that are not comfortable with Chinese quality and can’t afford Promolife’s models and still want to support western manufacturing may turn to Synergy, US based company that makes high quality generators such as WPS-100. And German readers may like to check out Dr. Hänsler’s state of the art products, but for home users they are probably over the top.
In short things you need for doing rectal insufflation:
-
oxygen concentrator from here (or local German Ebay site)or here
-
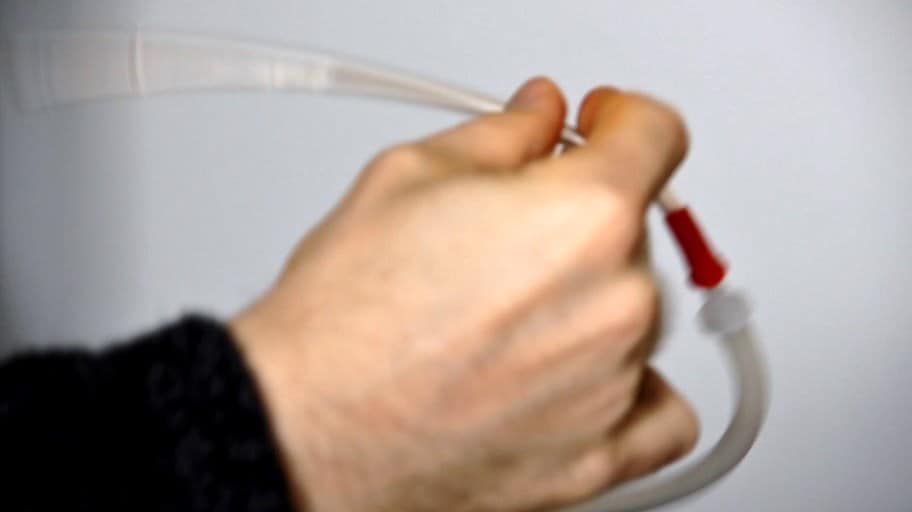
silicone tubing like this
First you can watch the video instruction that better visually demonstrate the procedure or you can jump right to the more detailed text and picture based guidance below.
Here is the procedure step by step:
1.Make sure you have had your daily bowel movement, or in the beginning it’s recommended to take enema, right before doing the ozone rectal insufflation. Enema bags can be found in any pharmacy or natural food stores or even at Amazon or Ebay. The one in the picture is bought from Chiang Mai Aden health food store.


2. Turn on the oxygen concentrator, and set the flow speed at 1/10LPM. It takes few minutes to calibrate itself and rise the oxygen concentration beyond 90%, preferably around 93-94%. Theoretical maximum is 95% for new machines. Older units may require even 10 minutes to reach the maximum concentration if their molecular sieves have been worn out by humidity or otherwise extensive use etc. You must check with the computer program how long it approximately takes to reach the maximum level before you start using the machine so that next time you can estimate the time without PC connection. But if the concentration is far below the target level the machine will give beep alert and error message by itself too.

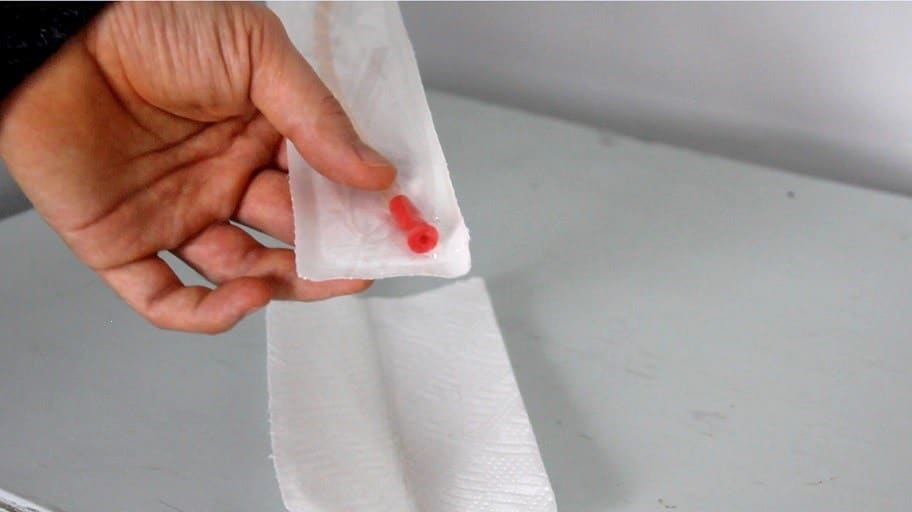
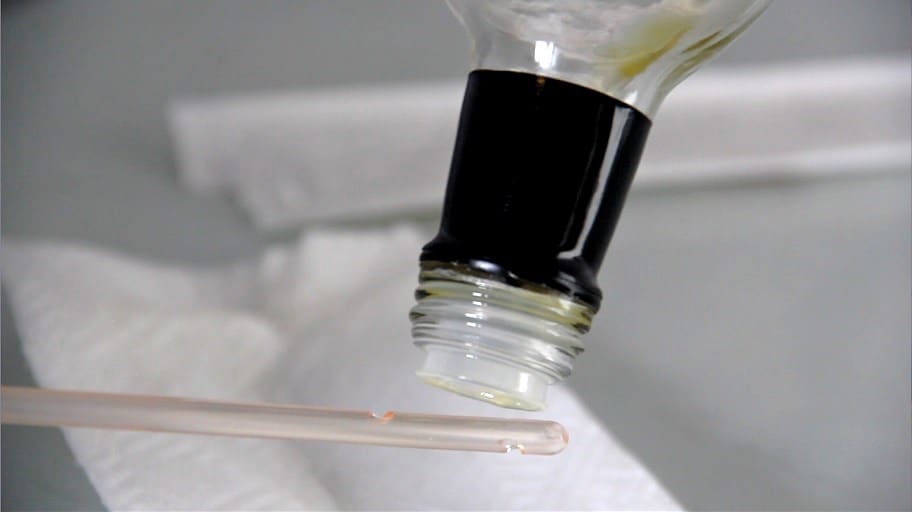
3. Connect the catheter to the tubes
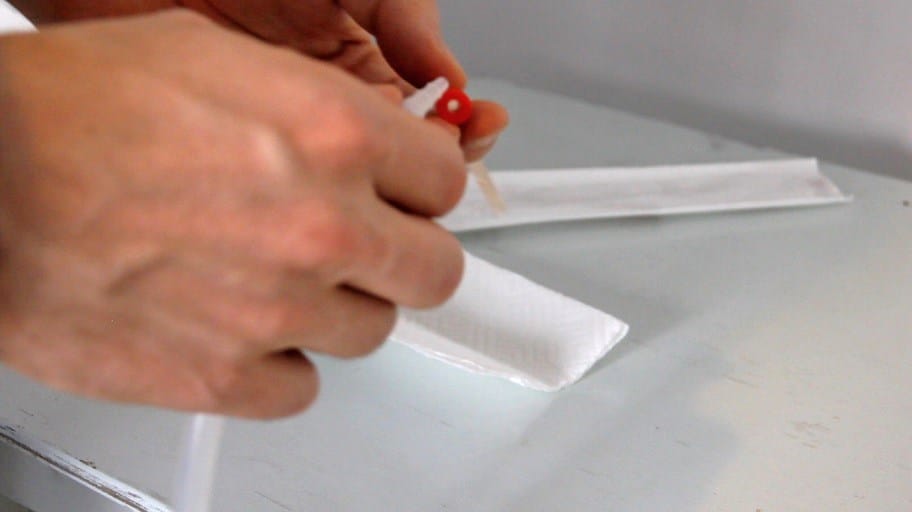
4. Take finished olive oil bottle and pour some last drops on tip of the catheter and brush it around. If the bottle is full, then naturally you need to pour patch of it on a small plate and dip your finger on that. You should also self-lubricate.

5. Turn on the ozone generator, set knob at around 25-30%. Assuming your pants are down, lay down on the side you prefer depending are you left or right handed, but preferably on the left side as the ozone will then go more easily deeper into the colon. After waiting ca. 20 seconds for the ozone to reach the tip of the catheter, take deep breath and then bring the catheter closer to sniff carefully and lightly whether the ozone is surely coming out. But DON’T breath in too deep, the ozone should not reach your lungs. If you smell the ozone then exhale through your nose to get the ozone out.


6. Insert the catheter to your rectum about 7-10cm(3-4″) deep and hold it there about 3-4 minutes. At the first times start carefully with three minutes that gives about 300ml ozone to your colon. Then over time when you get adjusted with the procedure move up to 4, 5 or even 6 minutes. Or you can experiment with lower exposure times and higher concentration or vice versa. Or just rise the concentration by turning the knob up to 45%. Don’t go beyond that on 1/10 flow speed because it may get too strong. It’s hard to evaluate the exact gamma as the oxygen is not 100% pure, but it’s going to be somewhere roughly around 20ug/ml at 25% and probably ca. 40ug/ml at 45% based on the chart I got from Enaly.

7. Pull the catheter out and turn off the ozone generator, but if you feel not sure you can hold the gas you can leave the oxygen concentrator still running in case you end up letting the gas out too soon and need to do the procedure again. You save the time of calibrating the machine again. In the next minutes you will feel how it is going. If things are fine you will end up absorbing all the gas and no farting will occur, but sometimes some amount of gas will come out after the ozone itself has been broken down and it’s fine and won’t affect the efficacy if it happens after about 30 minutes of the procedure. By that time all the ozone has been utilized and converted to it’s byproducts.
8. You can wash the catheter with hot water and soap to be used again if you don’t want to dispose it right away.
Personally I used catheter bought from Russian Polimernye Izdeliya and the limb bags in the pictures are from them too I assume. Or they might be from Medozon. I am actually not sure from which one they are as I bought them from the Finnish distributor many years ago. And the tubes I bought from local dealer of industrial products. But the catheter and tubes you can most easily buy from Promolife that sell all the necessary equipments for ozone home users. Especially if you live in the USA. It’s more pricey compared to buying separately from different sources like Amazon, but the advantage is you get everything you need under one roof as especially the suitable ozone proof adapter might be more hard to find conveniently anywhere else. And Sauna cabins are even more difficult to find elsewhere. I tried Promolife‘s ozone full body bag and I experienced some difficulties due to leakage of ozone to the environment through the zipper that may arise the risk of lung damage.
But if going the cheap way, some say even black garbage bag big enough for body to fit in, even partially, can be used. Also some people use protection suits made of tyvek for body ozonation. Here is discussion about the bagging method and warnings related to it. Most important conclusion is that it requires oxygen concentrator or tank and the ones using ambient air to produce ozone are not suitable as they will cause acid burns.
Ear insufflation can be done by modified stethoscope and passing the ozone gas through humidifier. Basic plastic humidifier usually comes with oxygen concentrator and it does the job although a glassware is always better. 1/10LPM or 1/8LPM flowspeed is fine for that purpose as well. I may do another video about it later, but so far Promolife has video to explain the basics.
For drinking ozonated water you can use generators that uses ambient air to produce ozone. The cheapest models unfortunately are not durable, so I recommend investing a little more than 20 dollars on it. Enaly OZX-300-AT fits the bill fine for that purpose and even allows external oxygen input.
Disclosure: There are affiliate links in this article. Please note that when you click links and purchase items, in most (not all) cases I will receive a referral commission for maintaining this website.
Legal disclaimer: Information provided is for informational purposes only and is not a substitute for professional medical advice. No health claims for these products have been evaluated by the United States Food and Drug Administration (FDA), nor has the FDA nor any other medical authority approved these products to diagnose, cure, or prevent disease. Since every person is unique, we highly recommend you to consult with your licensed health care practitioner about the use of ozone products in your particular situation before using ozone therapies on yourself. Neither medicaltravelling.com, it’s authors nor the manufacturers of these items are responsible for misuse of these equipments.